January 23rd 2023 By Claire Joyce
Writing is a complex activity, which requires a number of skills: co-ordination, motor planning, fine manipulation, and visual and auditory perception. Specific difficulties in handwriting can arise for a number of reasons.
Sensory delay occurs when a child is not getting the same messages from his joints as other children his age. You can notice this in simple games such as asking him to find a 50cent piece by touch in bag of coins or by recognising texture by touch. Without good sensations he will have difficulty feeling the pencil and controlling it accurately or moving his arm and hand to make the correct on paper.
Motor delay occurs when the child’s small joints lack stability. It can also be seen when shoulders are a little weak. This makes controlling a pencil very difficult as all joints of the arm (shoulder, wrist, elbow) have to be stable to allow the little joints to move.
To improve shoulder stability– this relates to the muscle strength and joint laxity around the shoulder girdle. It is an important factor for hand function and a prerequisite for writing.
- General upper body strengthening exercises e.g. :
-Wheelbarrows – i.e. walking on hands with feet held. Hands should be placed directly below the shoulders with the hands pointing directly in front. The steps should be of equal size. The back should remain straight and there should be no swaying of the pelvis as steps are taken.
-Animal walks
-Swinging on monkey bars
-Tug-of-war
-Pushing/pulling weighted objects.
- On all fours – encourage the child to round his back like a cat, then lower his arms and move his chin along his hands and then finally push up on his arms so that they are straight again.
- Limbo – using a rope held between two people the child goes under the rope, leaning back with knees bent. The rope is gradually lowered.
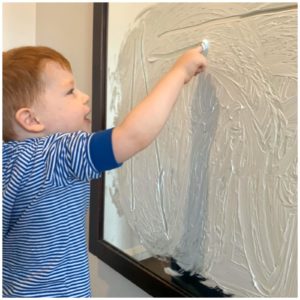
- Writing on a blackboard.
- Carry out fine motor tasks at a vertical surface e.g. blackboard or a large piece of paper attached to the wall.
- Encourage the child at times to lie on his or her tummy whilst reading, watching television, or playing games. This floor position encourages the child to take weight through his elbows and forearms.
Warm up exercises before writing
This aims to improve the child’s use of fine finger movements for writing.
This can involve shaking out hands, stretching them up to sky, out in front, joining hands together and squeezing fingers, wriggling fingers or pulling on each finger sequentially with the other hand.
Chair push-ups while seated (sitting on hands and pushing body up) will increase muscle tone in arms and hands.
Multi-Sensory approach to handwriting
- Try writing in shaving foam, sand, water brush writing or writing at a blackboard.
- Make letters out of playdough or clay.
- Try drawing letters with eyes closed.
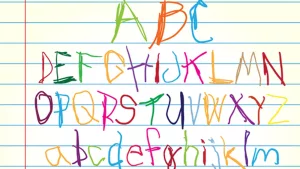
- The letter to be taught is drawn in large size on a chalkboard. At the same time, explain the way to form the letter i.e. where it starts, how many stops it has, and where it ends. Also say the name and sound of the letter (e.g. for “a”, it starts at the top, goes around, up and down “a”).
- The child traces the letter three times (with chalk or finger), verbalises the direction and sequence of strokes, and says the name and sound of the letter.
- The child copies the letter with chalk on the chalkboard three times.
- Erase the letter.
- The child draws the letter from memory.
- With eyes closed, the child draws the letter on the chalkboard to indicate that the letter is visualised.
- If this is successful, the child draws several letters on the chalkboard with eyes open.
- Ask the child to select the best one.
- The child then practises it on lined paper.
Development of pencil grasp
- Have a selection of different pencils/pens e.g. chalk, crayons, felt-tipped markers etc.
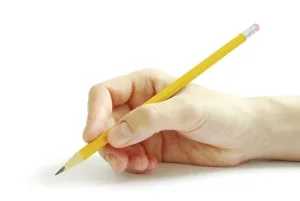
- Encourage the child to hold the pencil correctly
- Position – the pencil is grasped between the tips of the thumb and the index finger and is supported against the side of the middle finger.
- Demonstrate the correct position and help child place fingers correctly.
- Triangular pencils or pencil grips may help to assist with this and develop grip.
- Alternatively colour code pencil to remind the child where his thumb and fingers should be placed.
- When child has achieved the correct position, place paper on a textured surface ( e.g. templates, textured objects) while child scribbles or draws. This will help reinforce the correct position to the child. Also let them draw on large surfaces such as chalkboard or large pieces of paper.
- When the child can manage to use the correct grasp consistently, move on to tracing activities, outlining and colouring in small areas in pictures or colouring books.
Posture
- Be sure to check child’s posture when seated at the table to complete writing tasks.
- Feet should be flat on the floor.
- Desk or table height should not be too high or low, forearms should rest comfortably on the table.
Paper Position
Encourage paper position by:
- Providing a piece of tape placed in the proper position at the top edge of the desk against which the child can place the top edge of his writing paper.
- Taping a piece of paper on the desk at the correct angle. The child may position his paper directly on top of it.
- Teaching the child to position his paper by holding his hands and placing them upward on the desk. The writing paper can be placed within this triangle parallel to the writing arm. (Pic)
- Ensure the paper position is in the correct place. In general for the right-hander, the paper is to the right of the midline and tilted in an anticlockwise direction. For the left-hander, the paper should be to the left of the midline and tilted in the clockwise direction.9Pic)
- Ensure that the non-writing hand supports the paper.
Type of Paper
- Unlined paper may aid legibility for beginning writers because the addition of lines to the paper may act as an influence rather then an aid.
- Use fair lined paper, with different coloured lines or coloured area.
- Consider the use of raised line paper for children with poor kinaesthetic feedback.
- Consider the use of graph paper/squared paper for writing and doing maths.
To improve awareness and control of pressure exerted on pencil during writing tasks
- The child should sit at the table/desk with forearms supported on this surface.
- Get child to use a paintbrush to paint coloured lines from left to right across a page. Encourage them to use consistent pressure so that each line is the same width. The child can attempt this several times aiming to achieve little variation in width between each line. Then the child can try this exercise with eyes closed, using only the “feel” to keep pressure consistent.
- The next step is to allow the child to create lines with a soft lead pencil until they are of the appropriate darkness and width. Once this is achieved cut out the best line and tape it to desk, so the child can use this as a guide for appropriate pressure. When the child can manage to create lines, letters, shapes etc with the desired pressure try this exercise with the eyes closed.
- Place paper over a textured object or template, and get the child to rub over this with a crayon. If the child uses too much pressure the paper will most likely rip, and if too little pressure is exerted the image will not come through clearly onto the paper. When the child can manage to exert the correct pressure, try the exercise again with eyes closed.
- Place several sheets of carbon paper and plain paper underneath the writing paper. See if child can either press firmly to see if the writing is seen through the layers or exert light pressure so that no nark is made through the layers.
- If pressure is too light, select a pencil, which can easily make an impression on the paper.
Pencil Control Activities
- Tracing around templates of shapes.
- Dot to dot activities.
- Tracing over designs on a large piece of paper using a thick paintbrush, crayons or pencils. Try and get child to do this without stopping, going backwards or off the line.
- Writing patterns.
Letter Reversals
- Use A4 paper, write letters and numbers in correct orientation and reversal pattern. Ask the child to scan from left to right, line by line, abd to cross out the reversed ones. Gradually increase the complexity by adding a few more letters/numbers.
- Teach the child that b can be made with a bat followed by an O ball and c is followed by a d.
- Use circle and stick method by asking which comes first, i.e. for a b, stick first then circle.
Left-Handed Writers
- It is important to establish good handwriting habits from the beginning.
- It may help to work on a vertical surface when initially learning each letter’s movement. This will make it easier to see.
- Allow the child to try out a range of pens and pencils with grips or without. There may be different textures and the child needs to find the one that suits them.
- Use a soft pencil to start, especially with younger children as this will ensure the pencil glides more easily. Alternatively try a felt pen or roller blade.
- Paper should be positioned to the middle and tilted to the right at 30 degrees. This should then mean that the hand position is under rather then over the written word.
- The left hander should hold their pencil slightly up than aright hander.
- Remind the young writer that writing is from left to right by marking a red border down the side to start.
- Place the child facing the blackboard so that they are sitting in the correct position.
- Ensure the desk and chair are the correct height, otherwise the child will adopt a poor writing posture in order to compensate.
- Try to make allowances for smudges and untidy appearance. The child will work better with positive reinforcement of their skills. It will give them encouragement to adapt to the correct way of writing. This will also reduce the tension building up in their fingers and affecting the quality of their work.
Orientation L-R
- Use of colours, arrows, x’s, dots, or stars to designate directions.
- For starting and stopping points of letters e.g. green dot for starting and red dot for stopping in forming a letter.
- Mark vertical green line on left margin and red line on the right.
- Mark an arrow * -> on left upper corner of paper to indicate direction of L-R.
Spacing difficulties
- For spacing between words – right hand writers, use left index finger as a spacer between words, and for left hand writers use an a L shaped card.
- After a piece of written work, ask the child to use a highlighter to indicate the over and under pacing within and between words.
- Spacing within line boundaries – run scotch tape down (L) margin and ® side of the paper.
Problems with alignment (ability to stay on the lines when writing)
- Use of raised lined paper.
- Use workbooks with only two guidelines. The bottom line keeps the writing straight and the top line controls the size.